
How to Rebuild Font Cache in Windows 11
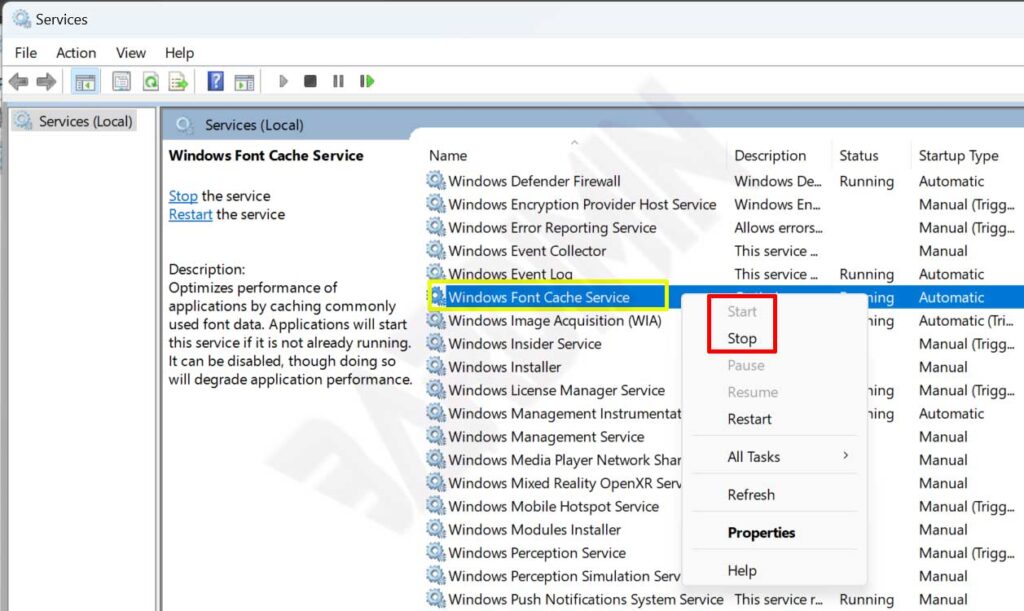
1] Open the Services Manager via the Run dialog box by typing 'services.msc'. In the list of the various services running on your PC, locate Window Font Cache Service. Double-click on it to.
How to Clear Font Cache and Rebuild Font Cache in Windows 11
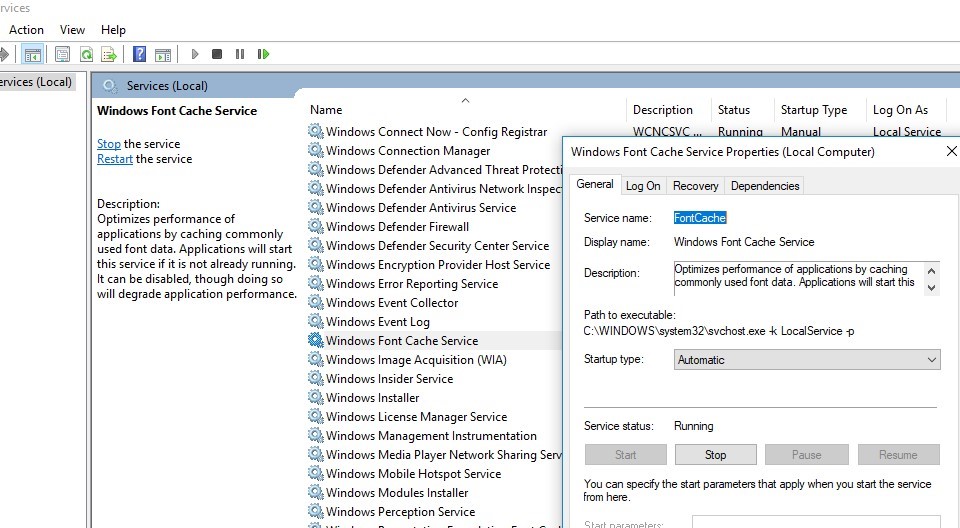
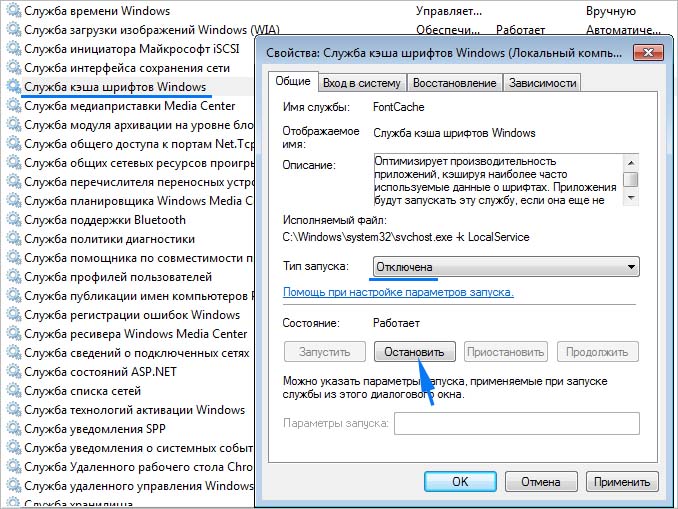
1. Press + R and type services.msc in the Run dialog box, hit Enter key to open Services snap-in. 2. In the Services snap-in, locate the Windows Font Cache Service. It must be running by default. Double click on it to modify its status. 3. On the service property sheet, set the Startup type to Disabled.
How to Restore Default Fonts in Windows 10 and 11? Windows OS Hub
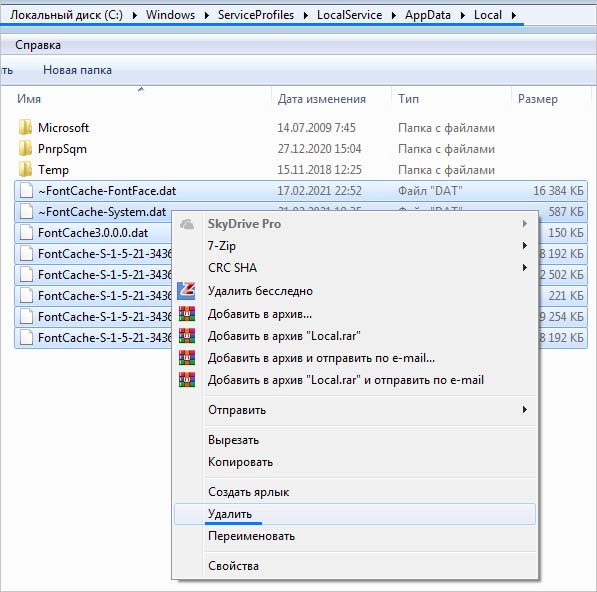
In a gist, you need to click "Stop" under the "Service status" option and select "Disabled" under the "Startup type" option. Then click on the "Apply" button. Now you need to clear out the font cache. Press the "Windows" key and the letter "E" key together on the keyboard. This will open the Windows File Explorer.
How to Clear All Cache in Windows 10
On Windows 10, you can install fonts in the TrueType (.ttf), OpenType (.otf), TrueType Collection (.ttc), or PostScript Type 1 (.pfb + .pfm) formats. If you have font files available that you'd like to install, browse to their location in File Explorer.
Как удалить кэш шрифтов Font Cache в Windows 10?
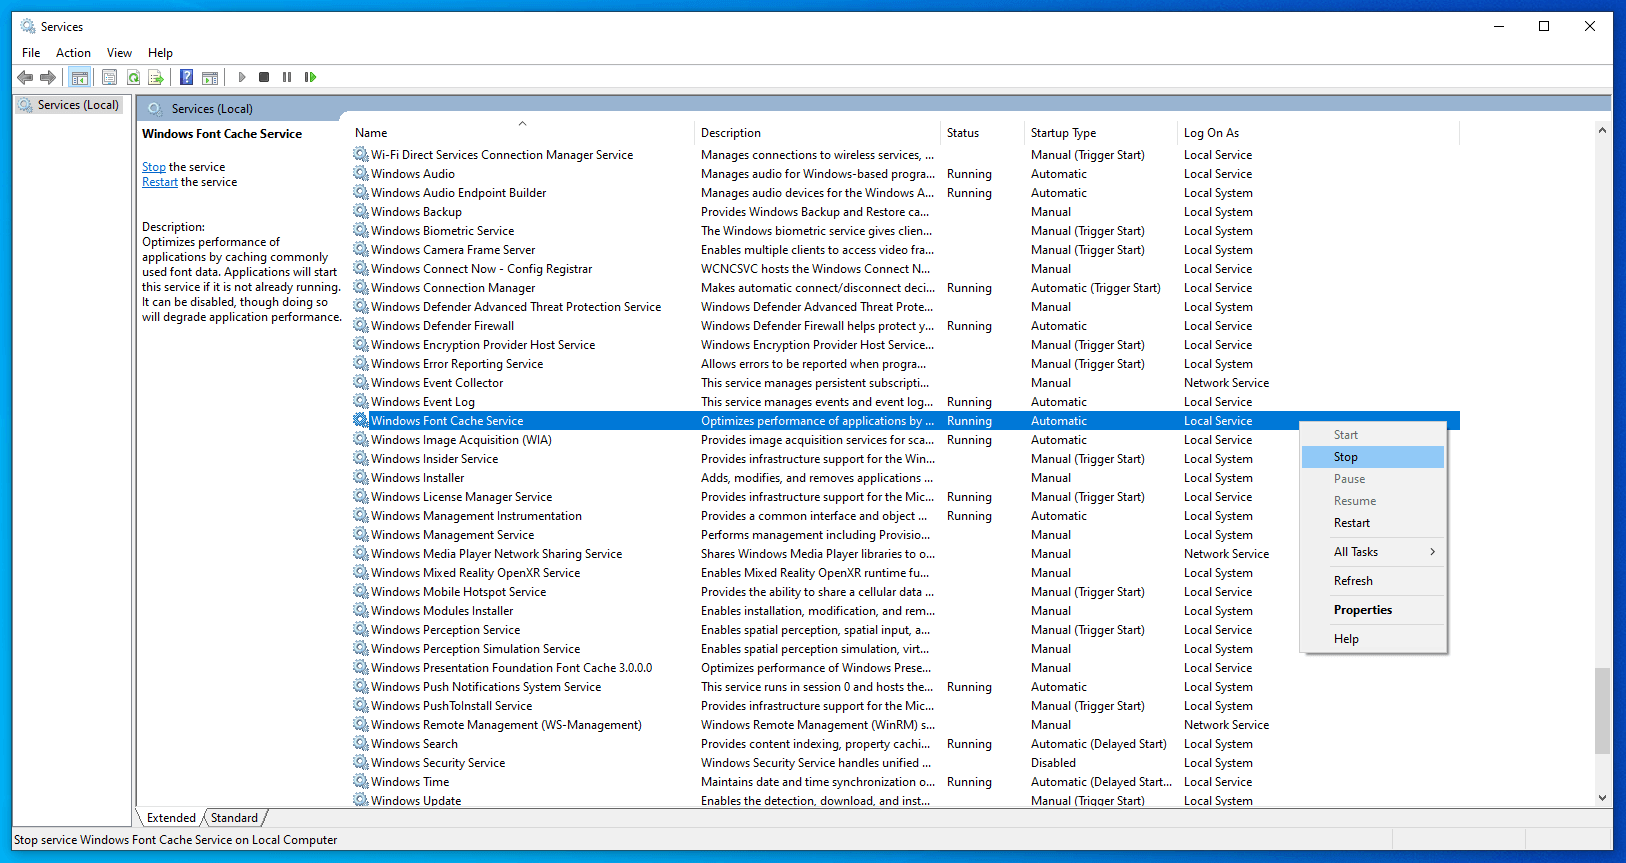
Method 1: Manually Rebuild Font Cache in Windows 10 1. Press Windows Key + R then type services.msc and hit Enter. 2. Scroll down till you find " Windows Font Cache service " in the services window. Note: Press W key on the keyboard to locate the Windows Font Cache service. 3. Right-click on Window Font Cache Service then selects Properties. 4.
How to Clear Font Cache on Windows
How to delete the Font Cache on Windows 10#window10FontCache allow the Windows OS to load fonts faster when you run the programs, explorer and so on. However.
Как удалить кэш шрифтов Font Cache в Windows 10?
Windows 10 & 11 both maintain a fonts cache allowing fonts to load faster. If you're having issues with your fonts, rebuilding the fonts cache can often solve the problem. Still, Windows does not offer a troubleshooter or any official way to rebuild the font cache, which might solve many font-related problems.

Rebuild Font Cache in Windows 10 TechCult
To rebuild the font cache in Windows 10, do the following. Press Win + R shortcut keys on the keyboard to open the Run dialog. Type services.msc in the Run box. The Services console will be opened. Find the Windows Font Cache service in the list. Click on the stop button on the toolbar.
Is Usermode Font Driver Host Malware? — How To Fix Guide
Press Windows key + R to open up a Run dialog box. Next, type 'control.exe' inside the text box and press Enter to open up the classic Control Panel interface. Opening control panel. Inside the classic Control Panel interface, type 'fonts' inside the search text (top-right section of the screen) and press Enter.

How To Clear All Cache In Windows 10 (2020) GEEKrar
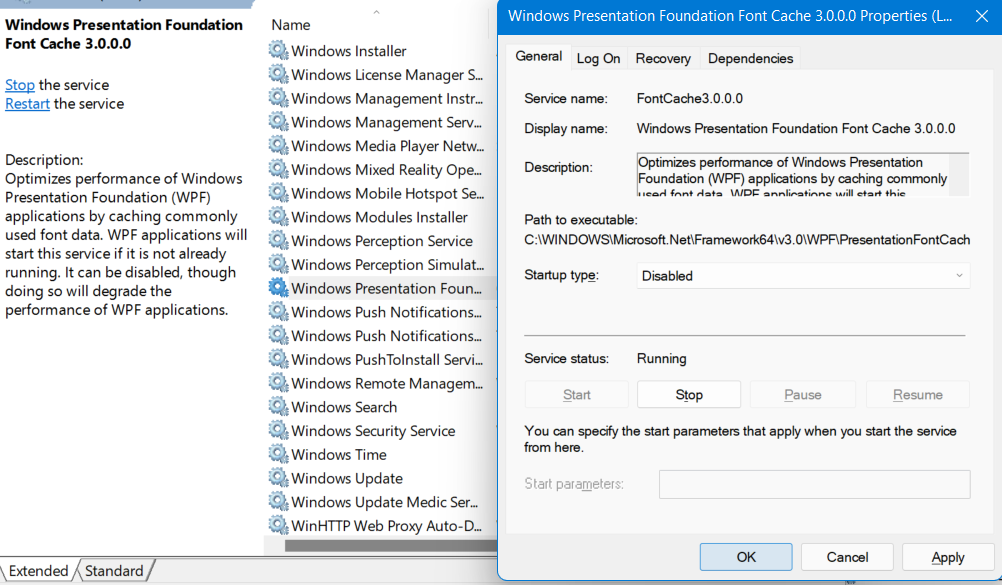
Locate the Windows Font Cache Service. Double-click on it to open its Properties box. Stop the Service and Disable it as well. The Windows Font Cache Service optimizes the performance.
How to delete font cache in Windows 11
How To Delete Font Cache in Windows 11 / 10. How To Delete Font Cache in Windows 11 / 10.
How To Rebuild Font Cache in Windows 10
The font cache is a file or set of files used by Windows to manage and display the fonts installed on your PC so they load faster. Sometimes the font cache may become corrupted and cause fonts to be garbled, not rendering properly, or displaying invalid characters.

How to Delete Font Cache & Rebuild Again in Windows 11
Step 1: Press the keys Windows+r from your keyboard at the same time. This opens the Run Dialog in your System. Step 2: In the Run dialog that opens, type services.msc and Press OK Step 3: In the Services window that opens, Search and locate Windows Font Cache Service from the list. To disable this service,

☠ How To Rebuild Font Cache In Windows 10 Coub
Answer A. User Replied on September 15, 2015 Report abuse Hi Erik, Thank you for posting in Microsoft Community. I understand your concern and I am glad to assist you. Method 1: I would suggest you to uninstall the Danish language pack entirely and check if it helps. Method 2: Press Windows key + R to open the Run dialog.

Reconstruir el caché de fuentes en Windows 10
Download 'Rebuild The Font Cache in Windows 10 & 11' from MajorGeeks, and extract 'Rebuild Font Cache.bat.' Right-click on Rebuild Font Cache.bat and click Run as administrator (all operating systems). Reboot. This tweak is included as part of MajorGeeks Windows Tweaks, and donations to the project and MajorGeeks are accepted here.

Rebuild Font Cache in Windows 10 YouTube
Fonts are not appearing properly, or it starts displaying invalid font characters in Windows 10? It is possible that the font cache is corrupted. To resolve.